Chapter 2 · Getting Started
Rooms and Categories
Before you program anything, the project needs its rooms. Rooms are not just labels. They decide how the building appears in the app, and they quietly feed information into the automation, from how long a light stays on to how the climate control behaves.
Setting them up correctly at the start saves a great deal of correction later.
By the end of this lesson you will be able to:
- Create and set up rooms in a project
- Explain why the room type and the room area matter
- Assign blocks so they appear in the right place in the app
The situation
You have a commissioned Miniserver and an empty project. Before placing a single light or sensor, you set up the rooms of the building: the bedroom, the kitchen, the hallway.
Two of the settings you enter here decide how the lighting and the heating will behave months later, without you having to think about it again.
A new project starts with one room
A new project has only one room: Central. Central is not a real room. It holds the functions for the whole building, such as turning off all the lights.
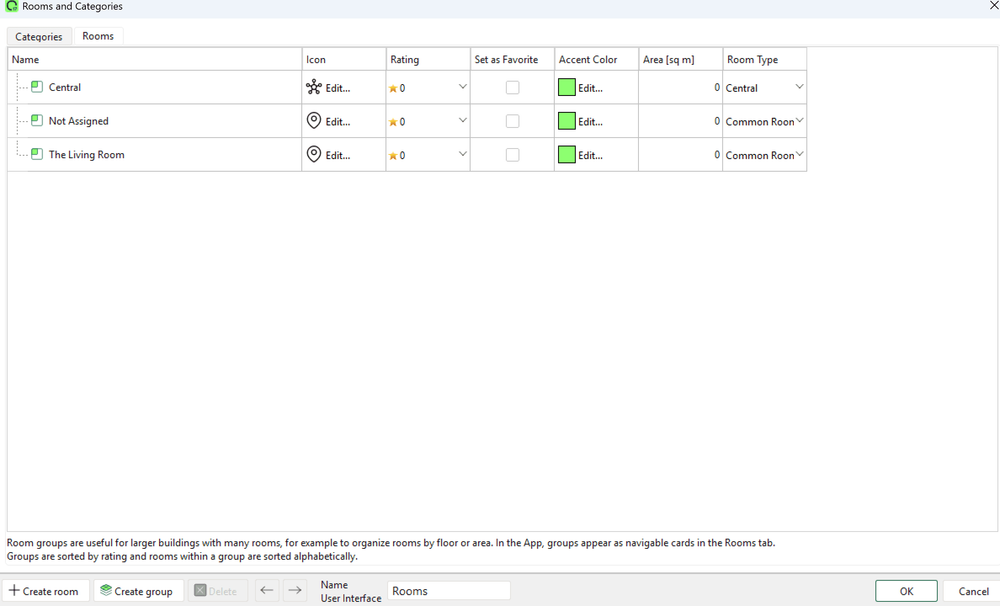
You create the real rooms yourself as the project grows, and assign each device to its room. There are two ways to create a room: from Edit Rooms, or while you create a new programming page.
What matters is setting each room up correctly, because the settings do real work.
Create a room in Edit Rooms
Two of the settings matter far more than they first appear: the room type and the area.
- In the list of peripherals, select Rooms, then click Edit Rooms on the ribbon.
- Click the plus symbol to create a new room.
- Enter the room name. This is the name the customer sees in the app.
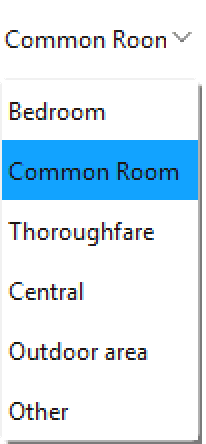
- Set the room type. Auto Configuration uses it to decide how the room behaves.
- Enter the area in m². The intelligent climate control uses it.
- If you wish, set the display options: rating for the sort order, favorite, icon and symbol color.
Why room type matters
The room type is not just a description. Auto Configuration reads it and adjusts how the building behaves.
The clearest example is lighting. In a room people only pass through, set as a Thoroughfare, the automatic lights stay on for a shorter time after motion, around 120 seconds. In a room where people stay, they remain on much longer, around 900 seconds.
Set the room type honestly and you get sensible behaviour for free.
| Room type | Typical rooms | Automatic light duration |
|---|---|---|
| Thoroughfare | Entrance, hall, technical room | About 120 seconds |
| Common Room | Living room, kitchen, office | About 900 seconds |
Why room area matters
The area of a room, in m², is used in more than one place. The intelligent climate control uses it to work out how the room heats and cools. Project Planning uses it to suggest how many lights the room needs. If the area is wrong, both the climate behavior and the light plan will be wrong too. It takes a moment to enter, so enter it accurately for every room.
How rooms shape the app
When you later assign a block to a room, that is what makes it appear in the right place in the app.
A block that is never assigned to a room ends up in an automatically created Not Assigned room in the app, which looks unfinished to a customer. Rooms are the link between your programming and what the customer actually sees and touches.